Rear Wheel
I’ve noticed the squeek other have in the rear brake. And I checked it well with the 1000km/safety inspection. Today however I noticed that the rear wheel is not quite aligned. I’ve not removed it, so it is how it came.
To remove the nuts on the right side took a big leaver - damn they were nice and tight. Removing those, and the extra twist nut, I was able to align the wheel better, re-tighten, and of course most importantly test the brake.
Then re-tension, and apply the lock nut, and the extra nut to screw. Be careful of the 10mm screw, it can not cope with a full strength tighten and will strip the thread if not careful.
Once I got it back together, tested it on the stand, I took it for a test ride. The rear wheel is not making anywhere near as much noise.
1000kmm
Technically done at 901km - should be done between 800 and 1000.
Work in Progress
This is a work in progress. I’ll keep updating it as I go through it.Plan on maintenance
I will be keeping track of all maintenance including all costs.
Initial Steps
Isolate battery
Isolate Battery
Turn off the battery using the circuit breaker, located under neath the left side of the tank.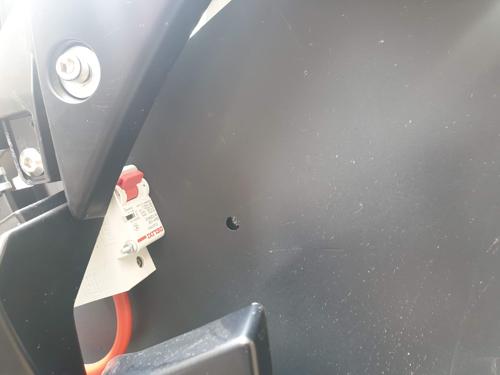
Isolate the battery
Stands
Mounted the bike on stands - not only giving more secure base, but allowing the wheels to move freely, keep it flat, and less likely to fall.
Initial once over
- Front wheel - doesn’t roll very smoothly, has a lot of friction, far more than I would expect. Would it make a difference, probably not. But I need to look up some manuals and check.
- Rear wheel - probably the brake, has a loud noise. I think this is just an issue with brakes, and I need to watch some you tube videso to see.
- Running the motor (yay standas) up to ab out 50k/h I notice quite a wobble at the back. It is very likely this wheel has not been balanced.
- CBS - got to experiment with the CBS, where using the rear brake activates about 20% of the front brake. I played with that, and can feel the front wheel almost lock as I gently apply the rear. But if I gently apply the front, the front wheel locks up nice and solid. So it works as expected, but I just don’t get the purpose - unless it is about older style teaching tequiques that used lots of rear brake.
Remove plastics and tanks
The bolts are pretty obvious. Keep track of the bolts, lengths, which have rubber grommits, and most importantly - that the little metal clips on the plastic, as they easily fall off.
One other note, is that some of the plastic is held down with plastic clips, be careful not to break them off.
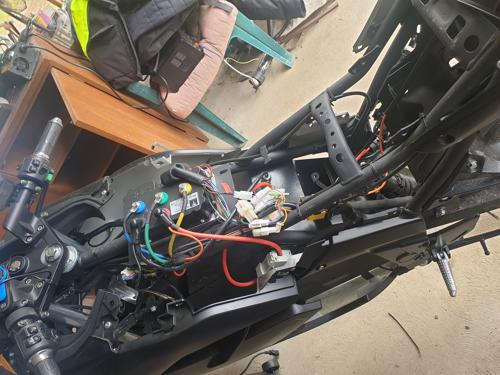
Panels and tank removed
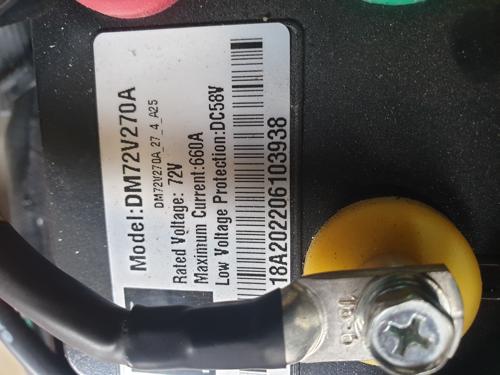
Picture of the controller model details
Fix Key issue
The key connector was easy to find. As I left the key on, I could move the cables and hear the connect/disconnect spark. There was nothing shorted. I disconnected the connector, checked each cable, made sure everhything was secure, well inserted etc. I then pushed the connector in smoothly and it clicked nicely. I then tested it very carefully, and no matter where I moved it, it continued to work well. So very easy fix.
Added cable tie to these and other connectors
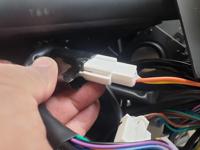
Reapired connector
Install new charging point
Complete and looks awesome. So much nicer to use than opening back seat.
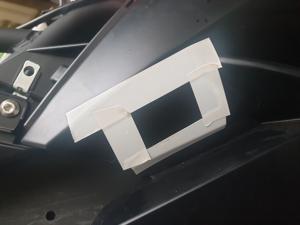
Mark out plug
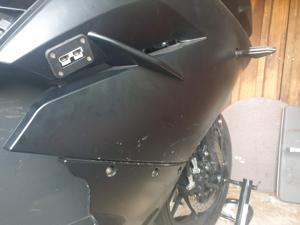
Fitted
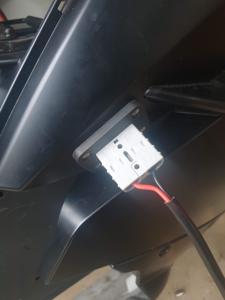
Connected
Cable Ties
To fix the key issue, and change charging point, I had to remove cable ties. Reinstall these. Note that also there was quite a few loose cables, some even that could reach moving parts such as suspension and steering - cable tie all of these.
Mount Battery Monitor on Dash
Move the battery monitor to dash instead of tank. Longer term location. Run battery cable for power and CAN bus connector for longer term monitoring options. Look at other USB connection options for 5V. Only got this partially done, will finish off in the future.
Other connectors
Check every other connector, and cable tie, or tape. A couple of connectors were a bit risky for shorting, so I tapped/heat shrink and cable ties.
Schedule
- Throttle
- Done - Make sure throttle is free and always resets to zero
- Brake fluid (dot 3 or 4)
- Done - Photograph now
- Done - check levels, replace every few years
- Done - Measure brake movement
- Batten
- WTF is this?
- Brake Pad
- Done - check, photograph, and clean disk
- Cables and hoses
- Done - check brake hoses, photograph
- Done - review all other cables - no wear, no movement that shouldn’t be
- Brake light switch
- Done - Back and Front brake operate light
- Headlight aim
- Done: Measure at about 5-7m. Should be about 5-10cm below for low beam
- Done - Headlights both work, including high beam
- Done - Tail light works
- Done - Number plate light
- Suspension
- Done
- Nuts, bolts, fasteners
- Done - Check bolts on brakes
- Wheels / Tyres
- Done - Tyres - photograh and measure tread depth
- Done - Tyres - check pressure
- Done - Wheels - visual inspection - paying attention to any cracks in the aluminium
- Check bolts on front and rear wheel
- Done - Bearings - check spinning free
- Steering head bearing
- Done - Move steering, make sure no free play, check bolt tight on steering. Check handlebars are tight.
My own additions:
- Battery Mounting
- Done check the battery is not moving
Space
There is heaps of space either side of the existing main battery to add further batteries. This would require adding metal bracket for safety. There is enough space where the old 12 volt battery would have been, and above the rear suspension for probably 2x20Ah batteries. Finally there is above and to the side of the rear seat.
There is more space than I though there would be. Certainly I need to yet mount my charger.
Costs
- $250 - for life time warranty
- $34 - 2 months of self service fee ($17/month)
- $10 - black spray paint
- $12 - Anderson Plug flush dash mount for charging
Not couting life time warranty, this service therefore cost me $56.
First
The manual has been released indicating that most of what we need to do is tightening, inspection, wheels, brakes, shocks and steering (usual bike stuff)
Purchased
- Some basic stands front and back. I found some with rubber mounts for the swing arm, so they work on bikes without first inserting the bolts. Not quite as stable, be aware.
- New set of good handled round head hex/allen keys. I note that the short end, with leverage is straight cut for good torque, and the other end has the rounded head, to allow better angles. There is a lot of hex heads on the bike, so this will save me a lot of time
- Better tyre pressure gauge - the one built into my compressor isn’t accurate enough. Decided to get a dial gauge rather than the pen like ones, as it is easier to read for only a little more weight.
- New Anderson Plus - especially a dash mount one. This is going to replace the EC13 plug on the side. The new one I have is panel mount, so will just need a slight cut out of the existing welded tab holding the EC13. Then I need to just use some good uv related heat shrink on the inside side to protect it from water. Unfortunately there is no external cover. Looking at options. See Battery Plug.
Learning
TODO - watch lots of you tube videos.
Plans
- Follow Schedule.
- External Charger replace with Anderson Plug
- Consider thicker gauge wires from battery to external charger
- This would allow another place to extend the battery
- Even possibly a sidecar !
- Fix Key (lock) issue - loose connection.
- Photograph
- Make sure won’t happen again
- Report to manufacturer
- Check ALL wiring
- Connections
- Quality of wires - note of any that may need replacing
- Connectors - find all connectors, lavel and document
- Add more cable ties to at risk wires
- Look at risks for water comming in, which wires are at risk (e.g. existing external charge port needs some work)
- Check lights - look at what the rules are and make a stencil for next time
- See if software can be connected, possibly even the Bluetooth dongle
- Investigate what is involved in removing the rear wheel to replace the tyre
- Check space in battery housing, and meausre well for upgrades / additions
- Measure and look at charger mounting options
- Tank - I have a feeling the tank could be cut down to a fraction of the size, and allow a heap of storage/battery - check it out and review.
Review Key Issue
Issue
My first issue on the bike has been to do with the key and moving the handlebars, will sometimes reset power. Turns out it is a loose connection at the end of the key wiring, which is only accessible under the (fake) petrol tank.
Temporary solution
For now, I have discovered using the remote to start the bike, does not cause any issues and is safe to ride until I do the 500km service and fix it properly.
Support
Received phone call, offering alternatives
Removed sides
Removed the plastic fearings below the tank to see if I could get access, and also inserted the camera to see where the problem was. It was too difficult to see. I reinstalled the fearings and will pull off everything, including the tank at the first service (500km)
I notice a little bit of rust on some of the screws. I’m looking into what to put on them before next install. I would normally juse use Marine grease but I’m concerned that will make them come loose with vibration.