This is the multi-page printable view of this section.
Click here to print.
Return to the regular view of this page.
Documentation
Random documentation by Scott
I am putting together all sorts of documentation about maintaining and hacking this bike.
Please take note:
- None of the notes here are legal advice.
- None of the documents have been checked by any sort of expert
- Many of the documents are only academic and for discussion
- Many of the issues/changes are also only for discussion or never implemented
- I am inexperienced motorbike rider
- I am not an engineer
1 - Overview
What documentation where?
What documentation where?
TODO: About this site, me, etc.
1.1 - Scott
Scott
See my other stuff here:
1.2 - Safety
Be safe out there. You are dealing with electronics, especially large batteries that can easily catch fire.
You are also dealing with a motorised vehicle with all the rules. Australia does allow you to maintain your own bike, but please do it carefully.
1.3 - Legal
Legal - is it, am I going to tell you?
Is my advice allowed
Sure, I can advise people. I can come up with ideas. Using this information on a vehicle designed for the road has all sorts of implications. I am not responsible for any of them.
2 - Bikes
Bikes - this is about the electric one, but I have other bikes, here they are. Also might get more electric ones later.
2.1 - Compared
Comparing - virtually anyway, other electric motorbikes available in Australia.
Approximate prices - 2022, Australia
| Bike |
Price |
Details |
Motor |
Battery |
Notes |
| Braaap EV5 |
$5000 |
5kW |
6kW |
Cheap sports bike |
|
| Braaap EV8 |
$7000 |
5kW |
6kW |
Cheap sports bike |
|
| Braaap EV10 |
$8500 |
5kW |
6kW |
Cheap sports bike |
|
| Evoke Urban |
$16000 |
|
|
|
|
| Harley LiveWire |
$35000 |
|
|
|
|
| Savic |
$27000 |
|
|
|
|
| Verge TS |
$36000 |
|
|
|
|
| Zero |
$25000 |
|
|
|
|
To be reviewed
- Novus One - US$54,000
- Weaver - cheap, like U$2000, 1.5kW
- DAB Concept E - US$11,000
- Sonda Meta Cycle - US$5,000 - 10hp, 4kWh battery
- Fonzarelli NKDa and NKD+ Electric (8kW?), + 12kW?
- AUS$10,000
- Belt drive
- Top speed 80kmh?
- The + has top speed 100kmh
- 150km range
2.1.1 - Braaap Moto EV5, EV8 and EV10
Since I have an EV5, I want to compare this to an EV8 and EV10
- Price (approx)
- EV5 $5000 (note, no ABS)
- EV8 $7000
- EV10 $8300
- Availablility ?
- Servicing - 1000km then every 3000km
- Warranty ?
- Battery
- EV5 - 80Ah, 72V, 5.7kWh
- EV8 - 100aH, 72V, 7.2kWh
- EV10 - 120aH, 72V, 8.6kWh
Variations in Models
It was not clear in purchase, but the 5000W version, does not have ABS or adjustable suspension. It appears the EV8 and EV10 do have both of these.
2.1.2 - Evoke Urban Classic and S
- Evoke Urban Classic - hub drive, 19kw, 8.5kwH, 4kW charge, $?
- Evoke Urban S
https://www.youtube.com/watch?v=UCvaxuG1UR8
- Price
- Classic = $16,500
- S = $16,000
- Specs (the Classic)
- Availablility ?
- Servicing ?
- Warranty ?
Compared to Braaap
This is between 2 and 4 times the kW and has a lot larger range (250km), and about 2 to 4 times the price.
2.1.3 - Harley Davidson Live Wire
- Price = AUD $35,000
- Availablility ?
- Servicing ?
- Warranty ?
2.1.4 - Savic
Savic, another Melbourne company that builds locally
- Price $27,000
- Availablility End of 2022
- Power 60kW (not LAMS)
- Battery 16kWh
- Servicing ?
- Warranty ?
2.1.5 - Super Soco TC Max
https://vmotosoco.com.au/model/super-soco-tc-max-spoke-wheel/
- Price ?
- Availablility ?
- Servicing ?
- Warranty ?
2.1.6 - Verge TS
Apparently available in Australia, but I can’t find them
These are amazing beautiful invovative bikes, but super expensive, 25,000 euros
https://www.youtube.com/watch?v=a7oTg6XJsnk
- Price = AUD $36,236
- Availablility ?
- Servicing ?
- Warranty ?
2.1.7 - Zero
Zero look good in Australia???
They seem to be second hand in Australia, can’t find new ones.
Zero SR
- Price
- New approx $25,000 approx
- Second hand $15,000
- MICRO PAYMENTS !!! You have to pay for upgrades
even through they are already in it !
Zero Upgrades via Software
We Need To Talk About ZERO Motorcycles
Everything is an upgrade. You pay to turn on the already installed heated handlebars. You pay to charge faster. You pay for software updates to use more battery. Just NO! This has to stop. We can’t allow this model into our lives.
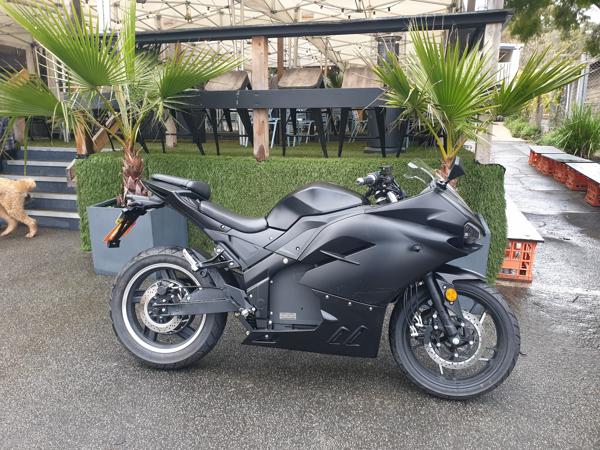
2.2 - Braaap Moto EV5
Braaap Moto EV5, 5kw electric motorbike 2022
Braaap Sale Page
Initial impressions
This is a cheaply made, mostly rebranded, bulk Chinese built motorbike. However, that isn’t a bad thing. Braaap have brought it to Australia for a really cheap price. I’ve seen videos of people importing models (clearly same factory, even though slightly different) into America for far higher price. Initially they look cheaper, but getting approval, import duties, GST, and most importantly, getting the actual thing you wanted - all this work has been done by Braaap!
When it comes to the bike frame, brakes, shocks etc, I am not a great judge, as I just don’t have the experience and I’ve frankly never before ridden a sport bike. From that limitaiton though, I find it appears to be well constructed, functional and easy to ride.
The controller used and hub motor is very common and used for many people who have done home conversions.
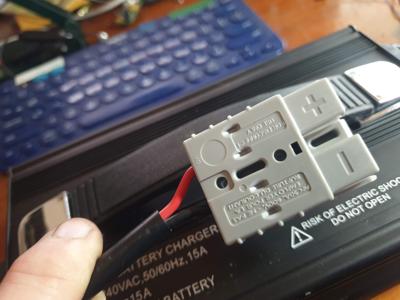
Connectors for electronics are pretty standard, and the battery charging and probably added battery, uses anderson plugs.
Updating, upgrading, modifying so far has been a breeze.
I have questions not answers, like how the hell do I remove the back wheel to replace a tyre, does it TRUELY require me to pull apart everything to get the wire out to remove the wheel and tyre. Its like it has been installed the same way people used to be sewn into their clothing.
You get what you pay for. Want something with DC charging etc, buy something more expensive. This is a both a cheap bike (build quality) and a cheap bike ($).
Totally no regrets, I see many years of play and upgrades to this bike.
Details
These are ongoing and included in my ride blog. Here is some basic bullet points.
- Price - Amazing
- Compared to other brands, a fraction of the price
- Compared to importing from China, about the same, but none of the huge hassle
- Individual parts - battery 2k, hub 1k, control 900 - that is almost the price of the bike, without a frame, brakes or wheels. It is a good price.
- Handling
- I really don’t know. I’m not experienced enough riding
- Performance (power)
- Plenty for me. Way more than my 125.
- I strongly recommend people review 8k or 10k if you are already a rider
- Upgrade / Hackability
- Build Quality - pretty average, maybe a little below average
- Components and Connectors have been loose
- Wires have needed cable ties where pinched
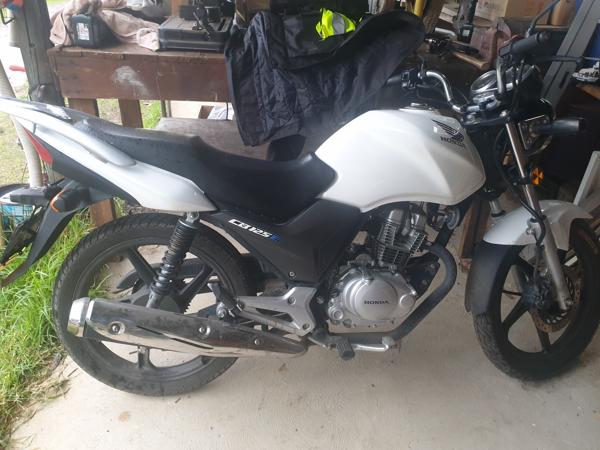
2.3 - Honda CB125e
Wikipedia Page
3 - Reference
Low level reference docs for your project.
References to external information
Braaap
TODO
- Controller
- Battery
- Hub Motor
3.1 - Controller
Details
- Braaap
- Internet Searches also show:
- YUANQU Fardriver ND96850
- NANJING Fardriver - seems to be more common name
- AKA Nanjing Yuanqu Technology Co., Ltd.
Software
- Windows ?
- Android
- Fardriver site has an APK you can download
See Also
4.1 - Schedule
Schedule of service according to the manual.
Services
Services listed for warranty.
- 1000km
- 4000km
- 8000km
- 120000km
Services listed at end of manual
- 800-1000km
- 4000km
- 7000km
- 10,000km
- 13,000km
- 16,000km
- 19,000km
Which one?
Go with every 3,000km and should be fine
What to do:
They are all the same on this bike:
“Inspection, cleaning, lubrication, replacement and adjust”
- Throttle Operation
- Brake fluid (dot 3 or 4)
- Batten
- Brake Pad
- Cables and hoses
- Brake light switch
- Headlight aim
- Suspension
- Nuts, bolts, fasteners
- Wheels / Tyres
- Steering head bearing
4.2 - Battery
Required battery maintenance…
Isolate Battery
Isolate can be anything from switching off to completely safe. At minimum, switch off the breaker. Reach up on the left side of the bike, under the tank to switch it.
The 500km service talks about connecting to a computer and doing a battery check. I am waiting on further information for this. Seems Braaap have dropped this requirement from the maintenance manual.
4.3 - Brakes
Brakes - standard safety checks
TODO: Find some good videos to add
4.4 - Connectors
The connectors are already well documented on the Braaap support site along with the Far Driveer site.
Specifics
Following are specifics I have documented on the connectors purpose, colours, connector type etc. See also wires in maintenance about safety etc.
TODO: Find Bluetooth, Serial and CAN bus connectors
4.5 - Daily
What do we do each day / each ride.
Usual safety check:
- Tyres - wear/pressure
- Brakes working
- Battery charged
4.6 - Fairings
Rough guide to removing fairings
Isolate Battery
Isolate can be anything from switching off to completely safe. At minimum, switch off the breaker. Reach up on the left side of the bike, under the tank to switch it.
The 500km service talks about connecting to a computer and doing a battery check. I am waiting on further information for this. Seems Braaap have dropped this requirement from the maintenance manual.
4.7 - Forks
Test the forks? Leaks, Pressure (find tutorial)
TODO: Find videos
4.8 - Motor
The motor, the wheel, the hub motor….
These I think are QS hub motors. There is lots of interesiting stuff on youtube on them. Here is a small collection:
See Also
4.9 - Steering
Esecpecially any slop in the movement or bearings. Check the steering bolts are all secure.
4.10 - Tighten
Specific Things
What to check and look for
Torque
It is important to get torque correct. Too tight, broken bike, too loose, broken head on the highway.
There is no details on this bike at all on what torque should be used for anything. I’m starting a list here.
4.11 - Tyres
Tyres are consumable, how to replace them
Pressures
TODO
Size/Specs
TODO
Repairs
Temporary repair options?
Replacements?
TODO
See Also
4.12 - Wheels
Wheels… spokes, pressure, wear, etc
Even if we go to the experts, we need to know how to take off the wheels, especially the back wheel which has a hub motor and wire leading to it.
TODO
The rear wire is very tight on frame. How do we remove the rear wheel?
Front Wheel Remove
TODO
Read Wheel
Remove
TODO - Suspect it will require removing the entire wire and routing to the controller.
Real Wheel Alignment
I found the rear wheel out of alignment with the bike. I can’t seem to see an obvious way to actually measure this. When I look at the swing bar I could see the offset easily.
Turns out the reason is fairly simple, you can’t lock it all the way to the back of the swing bar, or the brake rotation bar won’t fit onto the swing bar. When I first tried to align it, I hadn’t realised that wasn’t sitting correctly. Second time I moved both nuts forward on the axle about 5 to 8mm from the back of the swingbar.
Once in place, and making sure the brake rotation bar was in place correctly, I both checked each side of swing bar and a visual alignment down the tyre. Tightened both internal nuts, then the lock nuts, then finally the smaller 10mm screws designed to stop rotation. Note these last ones are poor mild steel and very easy to over tighten, so be careful.
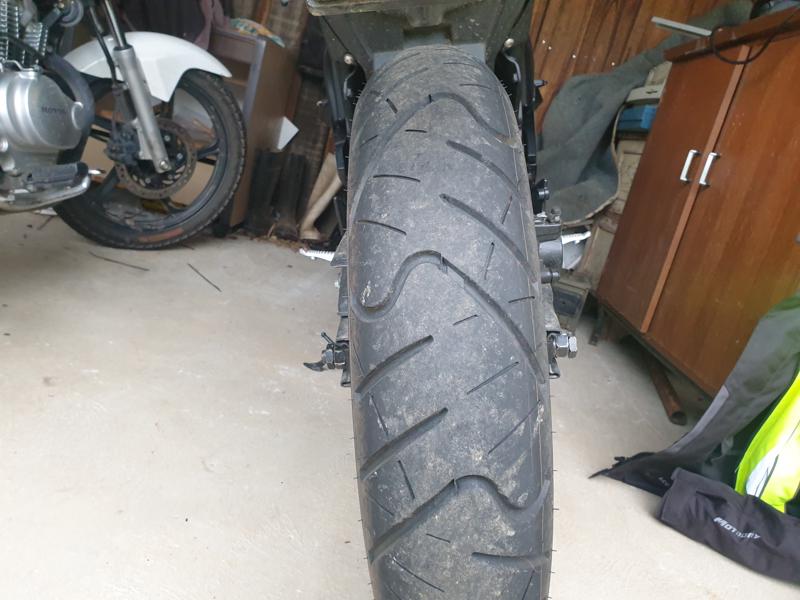
Have a look from the rear to see if you think the wheel is aligned. You can also look at the gap at the back of the swing bar
Put the bike on a rear stand, e.g. one that holds the wheel flat and off the ground. Swing bar stand.
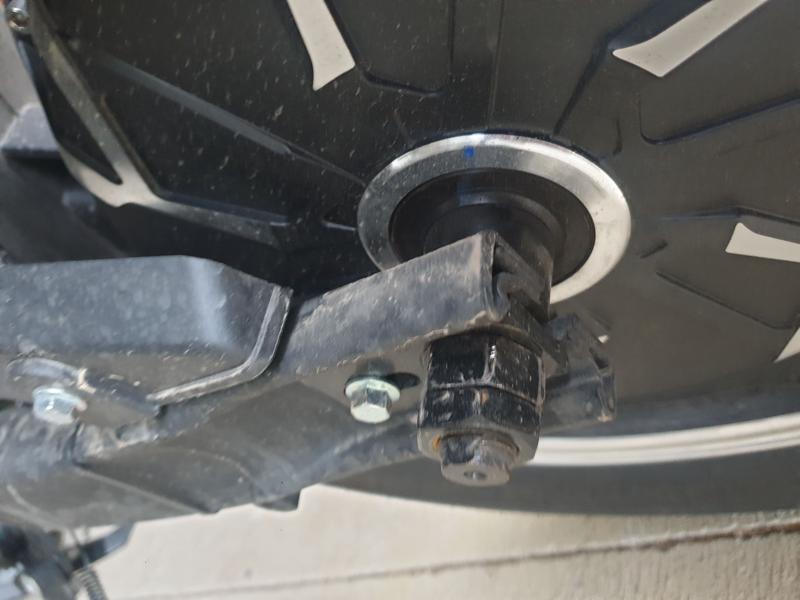
Loosen the outer nut first. I had to use a metal bar connected to my ratchet driver as I didn't have an impact driver. Then loosen the inner nut, you have to loosen it a few turns. Don't forget to loosen the smaller screw (stops rotation).
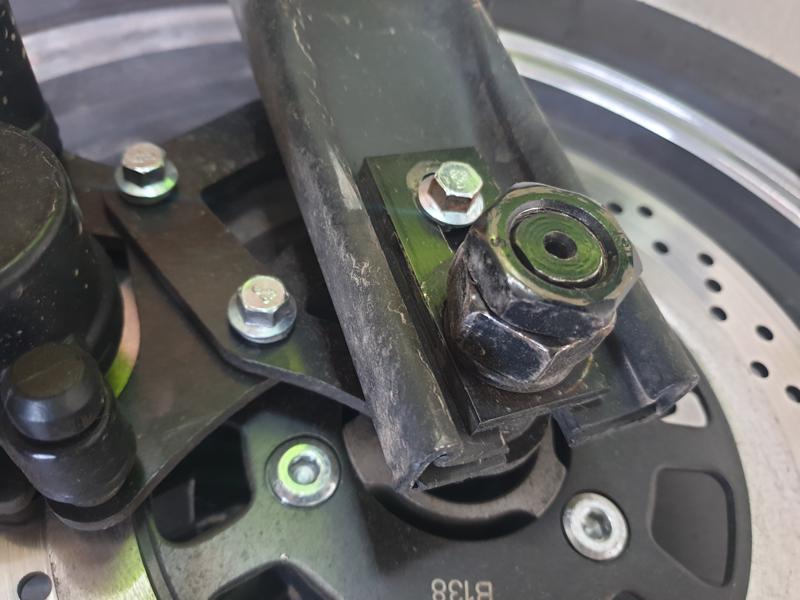
Repeat on the right side. When you tighten everything up - make sure you are careful not to overtighten the smaller screw - it is mild steel only. Also make sure the inner nut is screwed tight first. How tight. Very tight. I don't have the specs as they are not released. We need to push Braaap for better maintenance information.
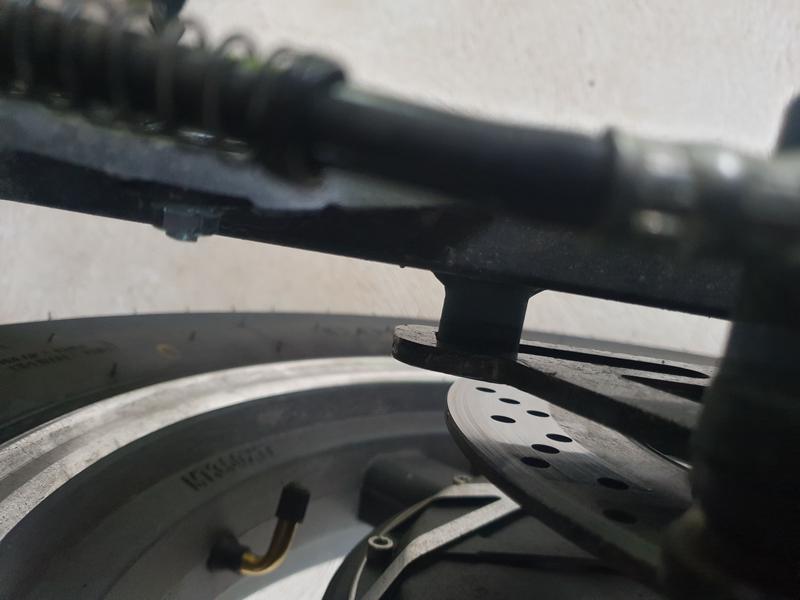
Be very careful to make sure the brake arm (stops rotation of the caliper mechanism) slot is in this holder.
Now tighten everything up and manually check the brakes. Then start the bike on the stand, spin the wheel (not too fast, keep it undr 100kph) and test the brake further. Did I mention you should check it is tight and that the brake is working. Good.
Balance
4.13 - Wires
TODO: Document what wires where, safety, mounting etc
5 - Battery and Charging
Battery, adding to, replacing, maintaining and charging.
5.1 - Add
I will be looking at the manufacturer add on batteries, and my own soon.
Manufacturer Battery Type
In my 5kw model - Ternary Lithium Battery, 72 volts, 80 Ah, 30kg
Where to get new batteries
Manufacturer
Wondering if you can buy the 10kW version battery, which I think is 120 Ah instead of 80, but should fit in the same space? Look into it.
Online
Expensive. I found almost all 50Ah + size batteries were over $2000. I found one 72V, 70Ah with a 10A charger for $1000 via China. This would double my range.
DIY
Not looked into prices yet. I’ve built batteries before, but never this large.
Location of Mounting
Existing Battery Pack
I suspect, considering the 8kW and 10kW bikes have larger batteries, there is space here. Look at that in the box.
Rear Seat
This is a nice easy location to use, either inside, below, to the sides or on top.
Side car
You could have sidecar, and carry camping stuff, etc
Rear Trailer
Better alternative to sidecar, I think they are easier/safer to use, and certainly cheaper. Should not be that hard to wire in the lights, and an extended battery cord.
5.2 - Charging
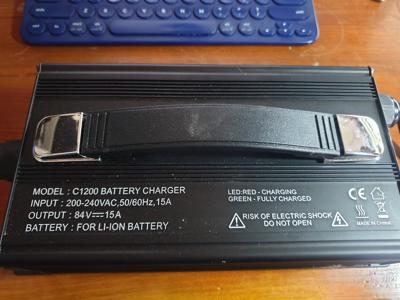
Stock Charger
The stock charger is good, it charges at about 80 volts, 15 Amps. So a little over 1000 watts.
- Specification (written on it)
- Model C1200 battery charger
- Input: 200-240 vAC, 50/60Hz, 15A
- NOTE: It has a 10Amp plug, and only drawers about 1200 watts, so that 15 amps above is WRONG
- Output: 84V, 15A
- Battery: For Li-Ion Battery
- Other notes
- LED Red = Charging
- LED Green = Fully charged
- NOTE: Blinks when not connected
Faster Charge
Since we have 240 volt, 10Amps = 2400 watts, available in Australia, we should be able to build a charger that delivers in excess of 25 amps.
There are some 25A and even 50A chargers available with full automation and 4 stage controllers and more feedback. Obviously 50 amp chargers need bigger houe plugs (17 amps). Australia can have installed 10, 15, 20, 25 and 32 amp single phase plugs. For now I will concentrate on 10 amp chargers, which should produce about 25 amps into the battery.
Manufacturer Fast Charger
There is a 25 Amp Fast Charge set that is designed to be used at electric car fast charge locations. It looks interesting and has the correct connectors etc. I don’t yet know anything about these ports, do they need some form of communication, like USB-C to set the voltage etc. On the web site there is a picture of the cables but also a box. I’m wondering if that box is going inside the unit
Understanding
EV Level 1,2,3 chargers
Level 3 chargers run at 480 volts, 100 amps. 48,000 watts, or more than 10 15 amp power plugs. So not in any way practical in home use.
Level 2 chargers,
https://www.lifewire.com/every-ev-charging-standard-and-connector-type-explained-5201160
Volts
The volts of the charger will say either 72 or 84. The batteries are 72 volt lithium, but need to be charged to 84 volts. Therefore chargers will sometimes say 72, sometimes say 84.
Solar
In the post is a Solar MPPT 72V Lithium charger. It is only a 600W charger, so max about 7Amps - but if I can get it working ok, it will be free charging. About 8+ hours is my estimate.
Mounted and Waterproof
The stock charger is not water proof and should not be mounted on the bike. I have purchased a seat bag (waiting) to put it in for normal use, and for shopping.
Braaap are going to release a fast charger (25A I think) designed to be mounted and to allow you to use commercial charging stations.
Untested list
Here is a list of other chargers you could buy online. I have not reviewed or tested any of these. You need at least IP65/IP66 (IP67 is for immersion in water for 30 minutes, and not necessary) for water resistence (generally this means splash proof). Technically 64 should be enough. You need a 72V charger. The battery has the main BMS (battery management system) for balance charging, but you still need to make sure your external charger has the right cut off.
Also the stock wiring in the bike is a little thing for 25A or 30A charger, even though the Anderson plug used can do up to 50A.
For reference, here are a few searches:
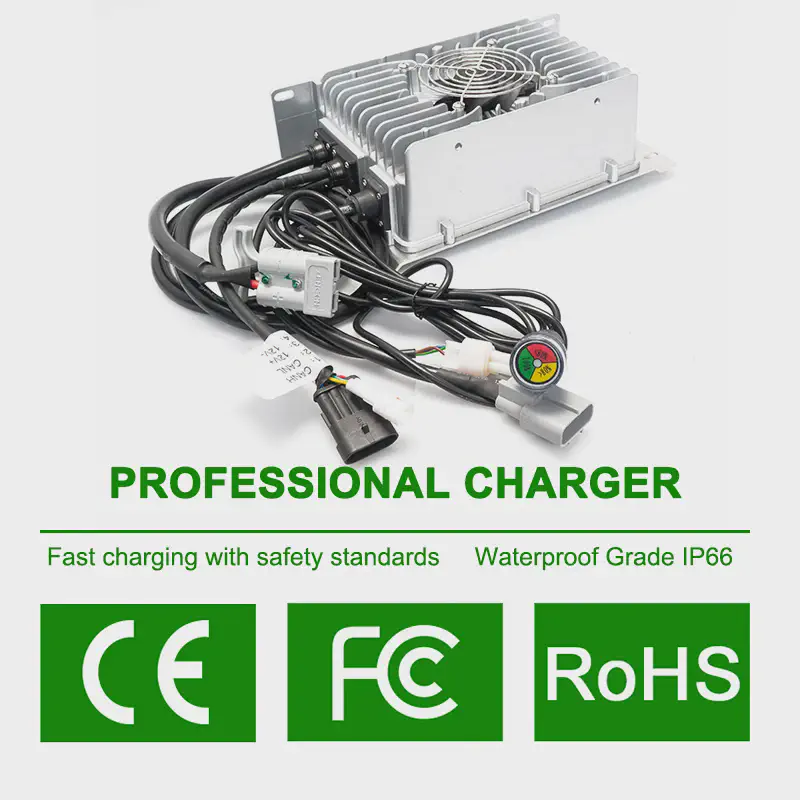
An example charger, with cables, indicator and rated IP66
5.3 - Mount
Mounting the charger onto the bike.
Locations
- Specific space side of bike
- Rear seat
Weight
Wire routing
5.4 - Plug
2022 as provided - In rear seat
Uses a Anderson Plug (TODO Model, rating etc). It has a large connection inside the motorbike, assuming down to the battery. It is always live.
I’m assuming that this is rated to at least 25 Amps for the fast charger.
This is a very high quality plug with plenty of amps. The stock charger, has a much smaller lead (due to it only being 15 amps).
2022 as provided - External plug
The manufacturer has removed the plug from the charger, but it is still on the bike.
It is actually a IEC C13, also known as a kettle cord. It is common in Australian kettles and most computer equipment.
https://en.wikipedia.org/wiki/IEC_60320#/media/File:IEC_60320_C13.svg
Don't do this!
Now anyone can see the issue here. You can, quite literally, plug in a 240 volt kettle / computer cord (IEC C13) into this plug, and also quite literally, destory the battery, or more than likely cause a fire.
I can’t find out information on if it is legal to use. I’m guessing yes, since we control what does plug into 240 volts, not the other way around.
These plugs are rated to 15 amps though.
Scott’s EC13
Use an EC13 and connect it in parallel on the charger, to allow an alternative plug. I will need to monitor current and temperature to make sure this is safe. Pretty confident it will be.
My plan would then be cover it in red heat shrink, and a plastic large label to identify that it is 72 (or technically 84) volts.
Scott’s Internal Charger
Manufacturer has provided a spot to mount the charger. In reality there is some holes, but I can’t see any way to put screws in, until I pull the bike apart.
Howevev, if I do connect that onto the side, route the DC cable back up to the existing Anderson connector, then I could replace that EC13 socket with a 3 pin (ie, including earth) to the charger. Then I only need to plug in a standard 240 volt kettle cord, which is easy to carry.
See Mount
2022 Manufacturer Fast Charger
Apparently the fast charger will fit into the fuel tank slot to allow simple plug into to Level 2 chargers out in the real world. I have looked at the tank, and it seems quite constricted. Maybe it is possible, or maybe they plan on replacing the tank.
Maybe there is other things I can use in that spot, as it is nicer than removing the rear seat.
New Anderson Plug
I’m considering a new Anderson Plug to replace the EC13.
The one I found looks like it will be easy to install and replace the existing one. Internally I can use some good quality UV/Water proof heat shrink on the wires, which will vastly improve what is there.
Externally though, I could not find a panel mount anderson plug that has a cover. I’m going to hack away at that today to see if I can make a rubber cover that pulls into place.
6 - Hacking
This won’t necessarily be actually hacking the bike, but rather more advanced upgrades.
6.1 - Battery Monitoring
The current battery monitor 5 bars is reasonably basic
I have built battery monitors in the past that have a better idea of battery.
I have started this, see Projects Battery Monitor
Purpose:
- Show more accurate state of charge (SOC)
- Count battery cycles, allowing for better understanding of longevity of battery
- Remote viewing - display
- Remote viewing - Bluetooth/WiFi
Basic
A basic version that just monitors voltage will already be useful.
Capturing all data should be good to experiment with.
An interesting idea is to keep track of voltage over time.
Voltage
This is a good start. Nice thing about a bettery monitor is we can watch this over time rather than the instantanious reading. This means we can give you more real world approximation of remaining power
Current
Using a shunt, looses a tiny bit of voltage (usually about 0.1V) and allows you to measure very high currents. This kind of setup of setup is a little more complicated. If I can do it that allows me to not only view the current used but also put into the battery, should allow me to very accurately measure state of charge.
Display
A display can easily be used to show the current information we know about.
Bluetooth/WiFi/LoRa
Radio to connect to WiFi, uploading data. Bluetooth to see on your phone instead of display above. Or LoRa for access to data anywhere LoRa is. Could also use cellular for another cost.
6.2 - Bluetooth
Far Drive have an Android/iPhone app and Bluetooth dongle
Now technically, this is just a serial to bluetooth dongle - probably taking TTL serial data, some power and creating a bluetooth dongle. It was cheap enough that I just purchased it from China and will play with other connections later.
Installation
Note: The plug is actually connected to a lead that goes into the rear seat, but with only the transmit wire from the controller. I’m assuming this is to allow people to connect bluetooth dongles or similar and read values but not make any changes.
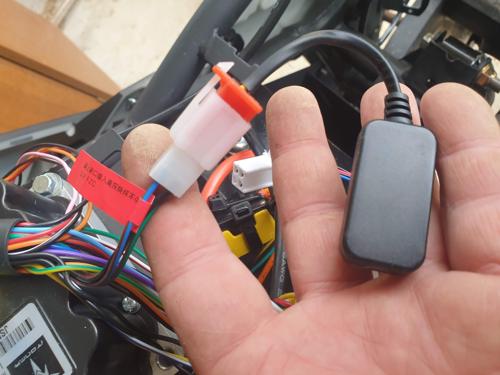
Bluetooth dongle installed
I connected it into the originanl plug, removing the wire to the rear seat, allowing full control.
Serial, Bluetooth, CAN
This connector is serial and power - and is used for this dongle and for direct connection to a windows laptop (although I still can’t source the software).
This bluetooth dongle, is just a regular bluetooth to serial dongle, and you could use others. Even the software on my android phone, picks up other bluetooth serial devices in the area.
Which serial, RS485, RS232, TTL is yet to be checked. I think it is RS485.
Next step will be to find the CAN bus addresses and messages. Some of them are pretty standard I think, such as speed - but not yet sure about voltage, and current.
The Dongle
It is easy to install and easy to use.
Security
Be aware there is ZERO security. If you leave this attached, then anyone with a laptop can change your settings. Use at your own risk.
Serial Protocol
TODO - I will be getting a dump of the data soon to analyse the information. I should then be able to extract the necessary data.
Points of interest
- Making changes here are temporary until reboot. Save to keep them.
- Changing things like motor direction - REALLY DOES - so be careful and lots of testing
- Rated power on this bike, although 5kW is set to 8kW - no idea what effect that has
- Throttle response from 0 (normal) to 1 (sport) has quite a significant shift. I found sport twitchy and suspect it will use a lot more battery power.
- The protection voltage is set to turn off at 56 volts, and bakc on 58 volts. This will be worth playing with later, to help me find out how to stop the sudden power off bug when battery is low.

- Voltage and Current, as well as throttle position are all here
- I’m going to update my battery monitor to use these, read from here instead to help with capacity.
- Capacity here seems to be related to voltage - just like the bars up the front, but here we get a whole percentage instead - this too could be easily displayed on my basic battery monitor.
- Since throttle position is seemingly accurate here - the bug with the display showing speed instead of throttle position is in the display.
- NOTE: The display is its own device, using the CAN bus (I think) to show speed etc. Not yet sure how to reprogram it, or better yet, replace it. (too hard to see in almost any sun, even with a black windshield).
- Current - had a lot of fun playing with current, like taking off up a hill, or with my feet down, and watching the current move. Very useful.
I didn’t get any further into looking at what they call curves (I would have called graphs, dials, and curves graphs/charts).
Software
Found a link to the code, yet to be tested
See Also
6.3 - CAN Bus
CAN bus - the standard vehicle bus
CAN bus, very nice. Need to see what it does and what it provides. Could be ideal for adding devices / hacking.
Connection
- Colours:
- CANH = Gold and Silver
- CANL = Blue and White
- Connectors:
- CAN/Speed Indicator
- Pin 3 / 4 = CANH
- Pin 4 / 5 = CANL
General Motorbike CAN bus
Questions / TODO
CAN Stuff
6.4 - HUD
I was thinking of something REALLY simple.
Indicators
Simple LED indicators in the helmet. I think this would be better than an auto canceller with all the complexities.
Battery Indicator
Don’t want it always up, reduce glare etc. Possibly a button to show, or a led that flashes briefly as down to last 25%
6.5 - Logger
To start with logging that includes:
- Trip
- Date/Time
- Battery voltage start/end
- GPS Location start/end
- GPS location during
- Battery voltage during
ESP32
A simple ESP32, that only comes on when the bike is on, would allow for logging of all trip information.
- GPS - Location
- Battery - voltage
- Speed and Distance - can be just GPS
Then when it returns home, leaving it on long enough to reconnect to WiFi and send data. It could also do bluetooth real time.
This could be also a good way of connecting to the
HUD
6.6 - Serial
Documentation shows Serial Port
The documentation talk about a serial port. Look at connection, and check what settings (baud et al) it uses, wheter it is 3.3/5 volt TTL, RS 232, RS 485.
And most importantly, see what it is telling us.
If I can get the software (looks like some Windows software) then I can read all the serial in and out and see what the protocol is.
Bluetooth
The bluetooth dongle, seems to connect to not just my android phone, but my laptop and desktop too. However I can’t seem to connect to it. ie, its probably not a standard Bluetooth profile. I should still be able to connect direct and see.
Windows
I don’t currently have a USB/RS485, ordered
Embedded CPU
The ESP32 I have has a RS485 connection, going to do a capture of all serial data from that. No idea the board rate, but most RS485 uses 115200 unless long distance.
7 - Issues
There are always issues. Lets find solutions.
7.1 - TODO
TODO: What I would like to check
A curated list of things I need to check if are an issue or not.
Battery Connections
There is an external charge port, and an Anderson plug under the rear seat. Are these protected? Are these fused?
Cable routing
I’ve noticed some of the cables come close to moving parts. I am going to review all of these during the service and see if any further cable ties need adding. Also some of the cavities allow mud/water in, I’ll check all the connectors are safe.
Fuse Box
Where is it? What does it control? Does it have spares?
Manual
All training online for maintenance, removing the wheel, checking ABS, etc is all talking about general information and pointing you to the specific shop manual for your bike. Where is the manual for this bike?
Update: A manual has been released, but does not yet have information needed such as removing rear wheel.
Two on the dash, 4 on the left side. None seem to do anything except one makes a noise. Also a “maintenance” button on the right handlebar that doesn’t seem to do anything.
Update: The 4 buttons left side is bluetooth speaker system
Quiescent current
Check the quiescent current of the stock charger to see if it can be left on long term, or needs a timer. ie. It should draw almost nothing when the bike is charged.
Display Brightness
TODO
Kill Switch
During a crash, the throttle may stay hard open with the bike on its side. I think a kill switch would still be useful safety. The controller already had support for it.
Update: The kick stand is the kill switch, but will outside people know? Might be not an issue.
Indicator Switch
Is switch back to middle common? Other motorbikes I have ridden press in to cancel - which is very easy to do. The slide back to the middle requires me to look down and check - as instead of switching left off to centre, I may have turned on right from centre - impossible to tell.
Horn
Seems pretty quiet, consider upgrading.
Lights
Review brightness and width etc
7.2 - Alarm
Volume
The volume of the alarm is a lot. However, I have no issue when the alarm goes off, my issue comes from pressing the button on the key - lock/unlock. Scares the hell out of people around me.
The alarm should be loud, the lock/unlock sound should not be !
7.3 - Back Brake
Back Brake is normally on the right foot of a motorbike, but left hand for bikes and scooters. Which is better?
Motorbikes
Almost all motorbikes have a clutch, therefore the back brake is down at the right foot.
Bikes and Scooters
Bikes and scooters do not have a clutch and therefore have the back brake left hand
Front Brake
Is right hand, and should be on everything. But be aware, some countries use the left side for front brake on bicycles.
What are you used to?
If you are used to clutched bikes, you don’t want to accidentally grab the rear brake thinking it is the clutch. This hasn’t been a problem for me, but I don’t have the years on motorbikes others do.
Consistent with motorbikes. This one is tricky, since it isn’t consistent with bicycles or scooters. We switch between cars and bikes and motorbikes.
The rolling on a hill argument is interesting. The idea there is that you keep right foot on the brake, and won’t roll, thus releasing your hands. Where as with hand brakes, you can’t use both hands. However, the opposite is true, you can use both feet. This doesn’t stop the roll, but can present you with a more stable ground, especially as a beginner.
Case for hand
Finesse. I find the gentle tacktle response far better control that using my foot. And it means I can wear chunkier boots when riding as I don’t need feet finesse to control gears and brake.
Conclusion
For me, no question, hand back brake on the left handlebars is FAR superior to a foot brake. I also totally understand people who have ridden for years tripping up on this.
7.4 - Balance
Balancing tyres is important
Checing balance
Put bike on rear stand, and spin up wheel. Do not over spin, check speedo, keep it around max of 100km.
Watch the vibration over the bike.
See Also
7.5 - CBS
No ABS, but does have CBS, so what is CBS
AWS and CBS and the rules in Australia
TODO. I have not reviewed this yet. I can say for certain that the front brake has no effect on the back wheel. Not played enough on the stands, using the rear brake.
Mainly my issue with CBS on this motorbike is that most of the new training etc talks about putting more emphasis on the front brake, which has no ABS, therefore no protection.
What is CBS
The front brake is not effected - this is where we really want ABS since 80% of braking is done on this wheel.
The CBS is basically a rear wheel brake which then adds in about 20% on the front wheel.
The concept of this is that people tend to be taught not to slam on the front brake, and fear of going over the handles, so that emergency braking has a large rear wheel input.
The problem is, this is VERY old advice. Using the front brake, well, is far more effective at braking.
7.6 - Charging Plug
See Battery Plug for more detailed information.
Type
The external plug on the bike is an EC13, which is clearly problematic, as in Australia someone may plugin a 240 volt cord from a computer or kettle. I remember a CB radio I had with USB charge cable, only it was 12 volts. Plugged that into my phone - but USB is supposed to be 5 volts !!!
Location
The external location one is great but wrong plug. The other cable (desired probably for extended battery) is under the rear seat.
7.7 - Hill Start
Hill starts - when your brake stops the accelerator?
Hill Starts
I’m finding hill starts very difficult. Initially I thought dragging my back brake during slow turns would not work, but once I am moving, I can add back brake without much concern, and move fairly slowly. Being a sport bike (I think) I am fidning it harder to move slow.
However, taking off up a hill (even a small one) is VERY difficult. The soft start on the accelerator means that I can not help but roll backwards before going fowards - as the accelerator does nothing until the brakes are both released.
General Uphill corners
Trail braking and similar suggesting putting 1-5% load on the front forks. I have found that heading uphill even a bit, I can’t touch either brake without completely disengaging the motor. This means that I get a very odd behaviour.
- Small amount of brake is the same as completely removing all power
- This, uphill, is very twitchy, since even engaging the brake light a tiny amount (<1% braking) instantly removes all power and gravity really slows you down. Down hill I don’t notice this much.
7.8 - Key
Key sometimes turns off bike
Isn’t it supposed to
Yes, I couldn’t resist. Yes it is supposed to. But when using the key, sometimes moving the handle bars turns off the bike. This is caused by a loose connection.
Fixing
TODO - not yet done, will be first service.
7.9 - Manual
Version from 25th October 2022 - MotoE 5000W
https://support.braaapmotorcycles.com/hc/en-au/articles/10682311179289-MotoE-User-Manuals
Errors
- Page 11 - Talks about the Potentiometer being the position of the throttle. It isn’t. It is current speed, it is a copy of the Speedo. It would be awesome if it it was throttle position!
- Page 16 - Park function disengages throttle yes - but it does NOT stop it rolling forward and back.
- Page 24 - says to park the bike, use clutch leaver and put it in neutral
- Page 24 - Safety parking MotoE 5000W said to put it into 1st gear so it won’t roll.
- Page 28 - Rest of manual is Australian, using km/h etc. But here it uses the American spelling of Tire, should be Tyre.
- Page 29 - This states that the front brakes of the 5000W is ABS Front Twin. Where as pages up higher says the 5000W does not have ABS.
Missing
The main one here is removing the rear wheel. Obviously if there is a tyre needing to be replaced, it needs to be removed, either by owner or tyre repair. However, due to the hub motor having wire in place, what is the process of removing that wheel? Also as it is a hub motor, it doesn’t use more common axle. And of course it is important to include which bolts must be in place and tension.
7.10 - Mirrors
Mirrors, how are they, upgrades etc.
Compared to my CB 125
On the CB125 I have mirrors attached to the handlebar, and I can easily see behind me. On the EV5 I can not see directly behind me, no matter where I put the mirrors, I’m just always in the way - I’m just too wide.
Options to fix
- Add / Replace with handlebar mirrors. There is already holes ready for them
- Add extensions to existing mirrors - just moves them out a little
- Handlebar end mirrors - not sure legality in Victoria/Australia and I would do them as addition, not replacment, would that then offer more confusion? To be considered.
Discussion
On facebook the discussion recommended either to try and adjust the arm (no luck for me, but might help others), add curved mirrors, add bar end mirrors, replace with mirrors similar to moto3
I have ordered some bar end mirrors to try.
7.11 - Parking
Parking, when you can’t leave it in gear?
Geared bike
Parking on a bit of a hill? In my geared bike I can leave it in first, and it wont roll.
P is for Park
But is it? As far as I can tell, P for park stops the bike from accidentally going, same as the kick stand down.
I am surprised there is no way to park, effectively short out the motor, so it won’t turn. Be worth looking at the controller to see if this feature is programmable.
The manual says P will stop the bike rolling back and forwards, but it does not work!
7.12 - Quiet
It’s quiet out there…. too quiet
Myth
There is a long standing myth in motorbikes that loud pipes save lives. This has now been studied so many times and every one of those studies has concluded that it is not true.
Now if you want to justify your loud pipes - go for it.
Studies
Anecdotal
Think about a vehicle comming towards you, vs going past you. They are SOOO much quieter until they pass you. When we talk about loud pipes, we are wanting vehicles in front of us to see us.
7.13 - Range
This document is more about logging information about the range, rather than actually an issue.
Advertised
Apparently about 80 to 120km
Initial testing
I’m not really in a posiotion to ride without concern. I don’t have a trailer, and I don’t always have someone to come and get me.
Real world
Kinglake trip was 66 to 70km and the battery went completely flat.
Planning on now doing this 3 times.
- Kinglake (70km) - heavy on the throttle, very fast in a few places - 66V, 3km short, flat.
- Kinglake (70km) - Average and sticking to speed limits - TODO
- Kinglake (70km) - Keep to about 60k/h, slower in the 80 and 100km sections - TODO
Range vs Voltage
Since we only have voltage, here is a rough guide.
7.14 - Stand
Purchase
For now I have purchased some eBay stands. Cheap but limited.
DIY - See Also
7.15 - Sudden Stop
Sudden stop on flat battery
Regular reviews
Almost every review I’ve seen of electric motorbikes, even cheap ones, has shown how when people do range testing on the battery, they all end up in a limp mode to allow you to get home or somewhere safe a little slower.
No limp mode
The lack of limp mode is painful! And also a little dangerous. I got stuck, with my first flat battery, on a very twisty bituman side road with nowhere to pull over and impossibly difficult to push up the hill
Restart
After restart I got another 500m, but was not able to move much in mode 1, had to use mode 3.
Battery Indicator wrong
It showed 2 bars and suddenly stopped
NO LIGHTS!
No Lights
Sudden stop means no lights, no blinkers, no emergency
My battery power failure was almost instant. One beep and it switched off.
This feels insanely dangerous to me. Imagine riding at 100km on twisty roads in the pitch dark and loosing all power suddenly, including lights.
I am actually quite dissapointed that this isn’t a requirement of safety in Australia.
Cutting the power to the wheel is acceptable. Not fantastic, I really want limp mode, also for safetly. But FFS do NOT turn off the whole bike.
Not only is this clearly dangerous without lights but then you have no way of using your emergecy blinkers and no way to check the voltage of the battery.
7.16 - Weight
Technically the manual says 190kg. Since the battery is only 30kg (Again, acooding to the manual) I am surprised.
However, there is a lot of information missing on this bike, so I am planning on doing some weighing and seeing what it actually is and where it is.
Regular Bike Weights
Since I have no clue, and therefore others won’t either, here is a rough idea of bike weights according to the internet.
- Braaap EV5 (not tested, in manual) = 190kg
- Honda CB125E = 137kg dry = 152kg approx
- KTM 390 Duke = 149kg dry = 168kg approx
- Average Adventure Bike = 250kg
- Average Sports Bike = 180kg
8 - Projects
Large scale projects I’m thinking about
8.1 - Battery Monitoring Basic
A basic battery monitor based on embedded board and analog reads
This is a very basic battery monitor using only the voltage to estimate SOC etc

Temporary location, water resistant, mounted using 2 screws from tank lid
What it does
- Read, log and display voltage
- Trips - keep voltage at start and end of each trip
- Calculations
- Display current voltage, averages
- estimated SOC (based on past data)
- SD Card
- Log data - for reprocessing the SOC calculations etc
- Start and end Voltage for each trip
- WiFi
- Automatic upload data on reconnect
- Remote update (OTA programming)
Electronics
Basic embedded board with an OLED display - probably not readable in daylight, but a good start. Board I have in mind has USB-C input so we can run it directly off the 5V USB port on the bike.
The Voltage measurement is a basic resistor divider with protection for spikes. These are not great accuracy over temperature range etc. However since we are only measuring 60 to 84 volts - I strongly suspect I’ll be able to calibrate it to the nearest decivolt (10th of a volt, e.g. 72.7 volts)
Fully automatic when you turn on the bike. Also allow a single button to reset too.
Second button to do with uplaods and WiFi connect.
Mounting and Battery Connect
Start simple. Mount directly on a USB cable plugin (boards are very light and easy to connect). Using the unused charge port on the bike, to easily access the battery voltage. Add a plug there that routes the wires up to the front.
Calculations and Display
- Current - a floating average, maybe once a seconnd, or every 5 seconds
- 30 Second average - the last 30 seconds, I have a feeling this is going to be very useful. The number might change, might be 10, or 60 seconds. We may even want to put up 2 or 3 averages - 10 second, 30 second, 60 second, 300 seconnd….
- Start Voltage - really useful for logging - did we start fully charged
- End Voltage
- SOC: State of charge, and estimates minutes and km left depends of course on a recent average, e.g. last 30 seconds riding similar would give X amount. The actual calculations are going to be a little fuzzy to start with. Using the log I will do my own calculations offline based on where I think the bike ended at. This can be tweaked over time, and even self adjusted based on the steady state of the end voltage.
Now
It calculates the voltage, 30 second average, but no SOC etc. Adding some SOC and logging soon.
Future
See Range Monitor project for next version. Basically it adds a GPS and will capture the accelerometer data too and possibly some temperature sensors.
8.2 - Donner Bike
The Braaap EV5 is a pretty cheap bike, less than $5k.
The Island Bike
I would love to:
- Remove most of the plastic
- Add some metal fenders etc for a little safety
- Replace tyres with dirt tyres
Get money!
Get some money so I can do this
Buy the EV10 (10kW motor version)
This has a 120Ah battery.
Steel the battery
Steep the 80Ah battery from the EV5 (an 80Ah battery would cost me about $2500) and use it to extend the range of the EV10.
Replace the battery
Put a 20Ah battery (about $500) into the old EV5 - which is plenty of range for my island bike.
8.3 - Ideal Controller
What is my ideal controller
This project is purely virtual. What would I do if I built a controller.
Features
Battery Voltage
Obviously should support 72+, possibly even 200+ volts
Motor
Starting 5kW and up to 40kW
Motorbike Features
- Indicators - Use accelerometer to help auto cancel
- Brake lights
Lock movement
- Hill lock - on stop, not pressing reverse, or holding brake, stop roll backwards using the motor.
- Lock for parking
Emergency Features
- Limp mode battery - adjustable amount remaining
- Lights and Indicators/Emergency flashes must be almost always availble
- Could be done with very low power (since LED lights)
- Or with a separate backup small battery
Brakes
These could be outside of scope of controller but ABS
Alarm
- Motion sensor
- Wheel lock - electrically lock wheel rotating
- Could be done not fully, like a parking lock, or when movement is detected
- Shorting the phases on the hub motor works well
- But many controllers do not allow shorting easily.
Battery Management
- Volts - clearly
- Amps - both out and in the charger
Regenrative Braking
It is useful and relatively simple.
Display
- Configurable widgets
- Some examples:
- Speed
- Accelerator position (how hard you pulling)
Architecture
Ideally split components into sections that are reusable.
Main parts:
- Battery Power convert
- Convert power to lower power for controllers and lights etc
- Indipendent of motor controller to allow lights even on motor failures
- ie. this is a 84V to 12V or 5V
- Two levels
- low quiesent low current for alarms and LED lights
- Higher power for headlights, and other services
- Motor Controller - also called inverter in EV cars
- Cut off on low power (see below re safety controller)
- Full control of hub motor (3 phase, rotary encoders etc)
- Regenerative brakes (see Drive controller)
- Locking control (either short or input on move)
- CAN bus or similar
- Input Controller
- Human inputs
- Brake switches (not the brakes, just the switch)
- Indicator switch
- Headlight control (high beam etc)
- Throttle
- Kill switches (e.g. kick stand)
- Mode switch
- Horn
- Accelerometer
- GPS
- Drive Controller (mostly talking to Motor Controller)
- This is a CPU for controlling the drive, but from a higher level
- Controls things like soft start and traction control
- Brake controller
- ABS et al
- Talk to Safety controller for brakes
- Work out if inputs need to be direct or not
- Safety Controller
- Take power from converter, indipendent from motor control
- Control indicators including emergency flashing
- Control lights
- Horn controller
- NOTE: Safety would allow for lights or indicators to remain on during catastrophic failures - e.g. loss of CAN input
- Alarm/Theft
- Separate battery to allow batteries removed for charging
- Movement sensors - from Accelerometer
- Control the output alarm
- Coded disable alarm
- Quiet beeps - for enable/disable alarm
- Medium - warning on move
- Loud - stop steeling
- Display
- See also input controller
- Display components such as speedo
8.4 - Ride Logger
Based on the battery monitor basic, but also adds in GPS or other ways of measuring distance
Purpose
- Automatically log every ride
- Detect each time turned on and off
- Data collected
- Date and Time (from GPS or WiFi)
- Distance (from GPS, maybe later from CAN bus)
- Accelerometer
- Temperature (maybe)
- Battery Voltage (averages over time, maybe 1 per minute)
- Upload
- Automatically uplaod each of these rides
Presentation
The idea is to present this data on a web site. Thus I can continually keep information up online of the rides, distances and most importantly the battery voltage over the trip.
This can then allow us to show chart of battery over the trip, so we can see if it is a constant lowering average, or if it has dips (e.g. up hills or on the freeway).
Advanced
Can analyse the route and work out type of road - standard, freeway, hilly, …
Security
Data can be made public with just the data, total km and volts, or track volts over time or even allow full access to track too.
9.1 - Key Fob
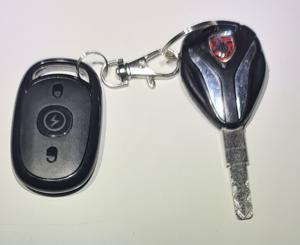
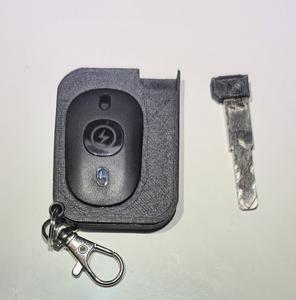
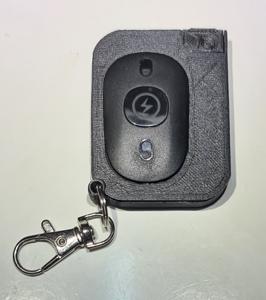
Nick Busse from the Braaap FB Group made this key fob
“Created a small quality of life improvement for myself today.
I almost exclusively start my MotoE using the remote, but still need the key for the steering lock.
So this is my attempt to save some pocket space and combine the two. It’s a little rough around the edges but I consider this a successful first draft.” Nick.
STL Files
Nick has provided the STL files you can use to print. They are provided as is.
9.2 - Luggage
Rear set luggage. I’m going all out. $29 for a bag.
9.3 - Mirror Extensions
Yes yes, you can buy mirror extensions cheap online. But I just love making things.
9.4 - Phone Mount
Location
TODO
Mount of choice
Quad lock
USB Power
TODO
9.5 - Space
Space inside the bike could be used
There is quite a lot of space inside the bike. Could be usd for things.
Rear Seat
This has a lot of space, but is mostly taken up with plastic around the back. Inside that space would be perfect for a small toolkit and emergency kit (bandages etc) - however it would fall through and be unsafe. I need to look at creating a closed space, probably using canvas, to store those things.
Battery compartment
TODO
9.6 - Windscreen
It is really hard to see the dash in the daytime. You can purchase a black windscreen.
DIY
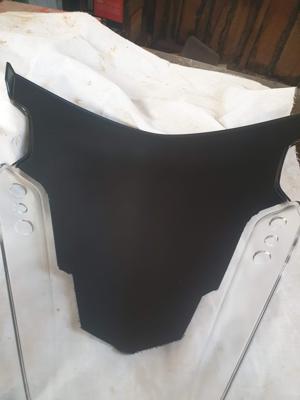
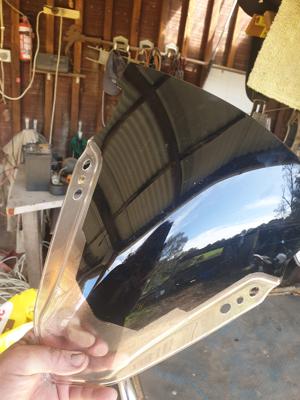
A facebook post suggests removing the screen and painting it black on the inside. Definitely doing that.
Done
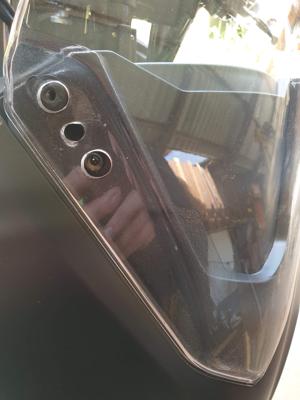
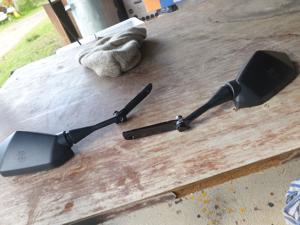
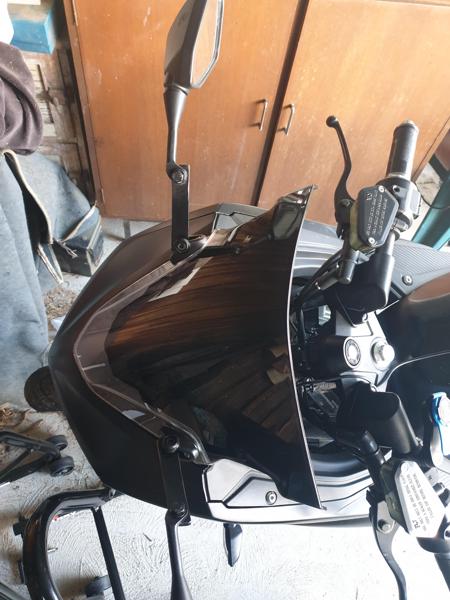
Remove mirrors. Lift from the back, unclips at the front.
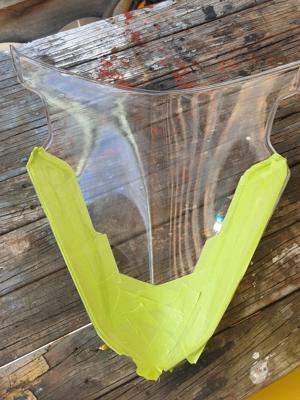
I taped up the rough part, to only pain the smooth. But I think it be better to do the lot.
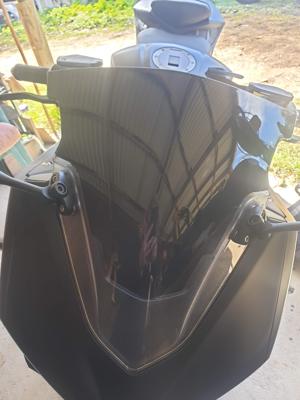
Installed and looking lovely.
Conclusion
In hindsight I probably would have not bothered taping, and sprayed it all. Good news is, I still can. It looks fantastic.
