Maintenance Stuff
This is the multi-page printable view of this section. Click here to print.
Maintenance
- 1: Schedule
- 2: Battery
- 3: Brakes
- 4: Connectors
- 5: Daily
- 6: Fairings
- 7: Forks
- 8: Motor
- 9: Steering
- 10: Tighten
- 11: Tyres
- 12: Wheels
- 13: Wires
1 - Schedule
Schedule of service according to the manual.
Services
Services listed for warranty.
- 1000km
- 4000km
- 8000km
- 120000km
Services listed at end of manual
- 800-1000km
- 4000km
- 7000km
- 10,000km
- 13,000km
- 16,000km
- 19,000km
Which one?
Go with every 3,000km and should be fine
What to do:
They are all the same on this bike:
“Inspection, cleaning, lubrication, replacement and adjust”
- Throttle Operation
- Brake fluid (dot 3 or 4)
- Batten
- Brake Pad
- Cables and hoses
- Brake light switch
- Headlight aim
- Suspension
- Nuts, bolts, fasteners
- Wheels / Tyres
- Steering head bearing
2 - Battery
Required battery maintenance…
Isolate Battery
Isolate can be anything from switching off to completely safe. At minimum, switch off the breaker. Reach up on the left side of the bike, under the tank to switch it.The 500km service talks about connecting to a computer and doing a battery check. I am waiting on further information for this. Seems Braaap have dropped this requirement from the maintenance manual.
3 - Brakes
Brakes - standard safety checks
TODO: Find some good videos to add
4 - Connectors
Connectors
The connectors are already well documented on the Braaap support site along with the Far Driveer site.
Specifics
Following are specifics I have documented on the connectors purpose, colours, connector type etc. See also wires in maintenance about safety etc.
TODO: Find Bluetooth, Serial and CAN bus connectors
5 - Daily
What do we do each day / each ride.
Usual safety check:
- Tyres - wear/pressure
- Brakes working
- Battery charged
6 - Fairings
Rough guide to removing fairings
Isolate Battery
Isolate can be anything from switching off to completely safe. At minimum, switch off the breaker. Reach up on the left side of the bike, under the tank to switch it.The 500km service talks about connecting to a computer and doing a battery check. I am waiting on further information for this. Seems Braaap have dropped this requirement from the maintenance manual.
7 - Forks
Test the forks? Leaks, Pressure (find tutorial)
TODO: Find videos
8 - Motor
The motor, the wheel, the hub motor….
These I think are QS hub motors. There is lots of interesiting stuff on youtube on them. Here is a small collection:
See Also
- https://www.youtube.com/watch?v=MVUB27U3g3k - QS Motor disassembly 135mm electric bike spoke hub motor
- https://www.youtube.com/watch?v=QA2qQkexj2g - Ebike Hub Motor Disassembly and Reassembly
- https://www.youtube.com/watch?v=XudHcNEgSfU
- https://www.youtube.com/watch?v=7uhWRFgTcKA - 8 KW QS Motor Swingarm Assembly
- https://www.youtube.com/watch?v=omh9kbEcb-M - Balancing an Electric Hub Motor
- https://www.youtube.com/watch?v=N3GxERaohhQ - QS Motor Disassemble & assemble bearing
9 - Steering
Check steering
Esecpecially any slop in the movement or bearings. Check the steering bolts are all secure.
10 - Tighten
Tighten everything
Specific Things
What to check and look for
- TODO
Torque
It is important to get torque correct. Too tight, broken bike, too loose, broken head on the highway.
There is no details on this bike at all on what torque should be used for anything. I’m starting a list here.
- TODO
11 - Tyres
Tyres are consumable, how to replace them
Pressures
TODO
Size/Specs
TODO
Repairs
Temporary repair options?
Replacements?
TODO
See Also
12 - Wheels
Wheels… spokes, pressure, wear, etc
Even if we go to the experts, we need to know how to take off the wheels, especially the back wheel which has a hub motor and wire leading to it.
TODO
The rear wire is very tight on frame. How do we remove the rear wheel?Front Wheel Remove
TODO
Read Wheel
Remove
TODO - Suspect it will require removing the entire wire and routing to the controller.
Real Wheel Alignment
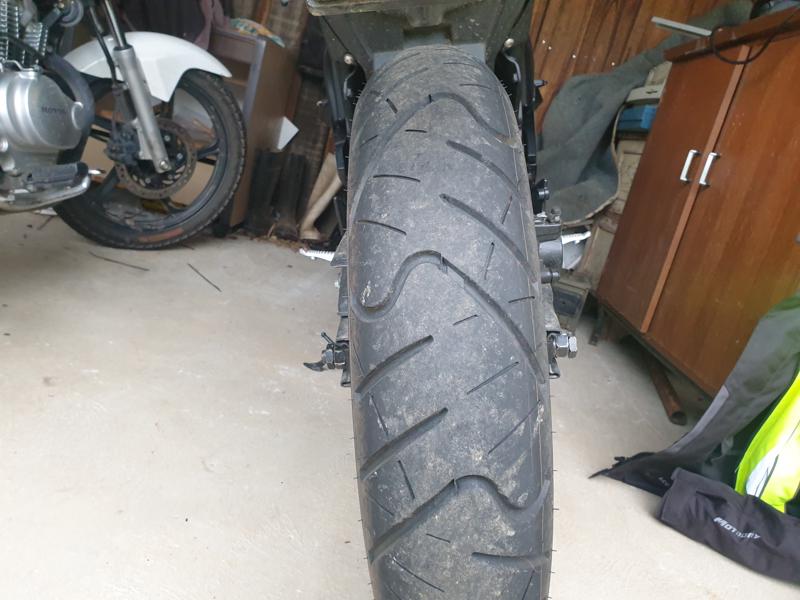
I found the rear wheel out of alignment with the bike. I can’t seem to see an obvious way to actually measure this. When I look at the swing bar I could see the offset easily.
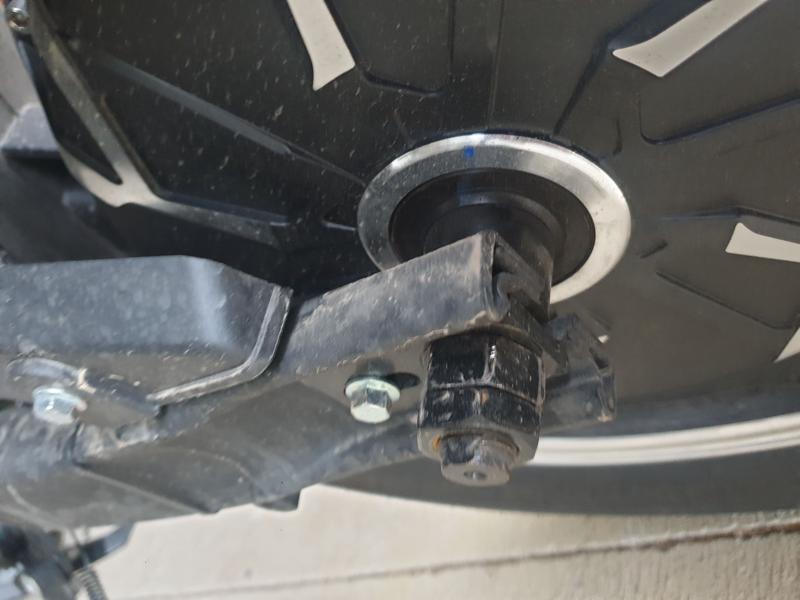
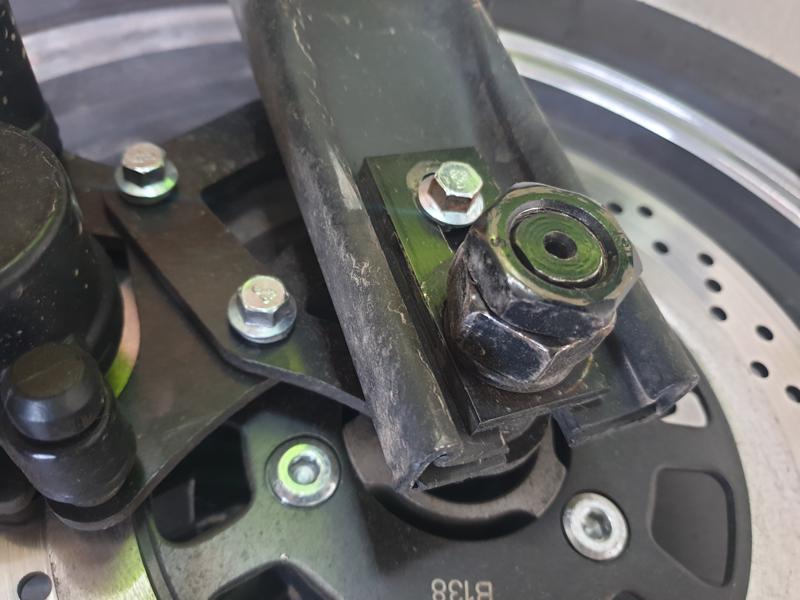
Turns out the reason is fairly simple, you can’t lock it all the way to the back of the swing bar, or the brake rotation bar won’t fit onto the swing bar. When I first tried to align it, I hadn’t realised that wasn’t sitting correctly. Second time I moved both nuts forward on the axle about 5 to 8mm from the back of the swingbar.
Once in place, and making sure the brake rotation bar was in place correctly, I both checked each side of swing bar and a visual alignment down the tyre. Tightened both internal nuts, then the lock nuts, then finally the smaller 10mm screws designed to stop rotation. Note these last ones are poor mild steel and very easy to over tighten, so be careful.

Have a look from the rear to see if you think the wheel is aligned. You can also look at the gap at the back of the swing bar
Put the bike on a rear stand, e.g. one that holds the wheel flat and off the ground. Swing bar stand.

Loosen the outer nut first. I had to use a metal bar connected to my ratchet driver as I didn't have an impact driver. Then loosen the inner nut, you have to loosen it a few turns. Don't forget to loosen the smaller screw (stops rotation).

Repeat on the right side. When you tighten everything up - make sure you are careful not to overtighten the smaller screw - it is mild steel only. Also make sure the inner nut is screwed tight first. How tight. Very tight. I don't have the specs as they are not released. We need to push Braaap for better maintenance information.

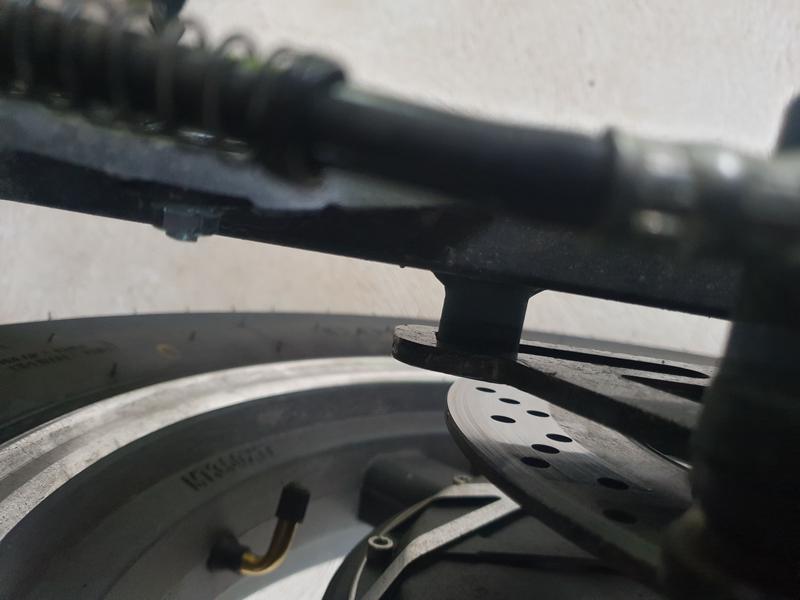
Be very careful to make sure the brake arm (stops rotation of the caliper mechanism) slot is in this holder.
Now tighten everything up and manually check the brakes. Then start the bike on the stand, spin the wheel (not too fast, keep it undr 100kph) and test the brake further. Did I mention you should check it is tight and that the brake is working. Good.
Balance
- TODO
13 - Wires
Wires
TODO: Document what wires where, safety, mounting etc